

UTM: A free & open-source hypervisor for macOS
Run VMs on macOS silicon with near native speeds


Used Virtualbox for virtualisation for the longest for its availability on all platforms (Windows, macOS and Linux) and its ease of use to set up multiple systems make it a go-to solution. It's an awesome tool 😊.
Recently, while setting up a hypervisor (virtualisation tool) on macOS silicon architecture I came across some issues and was not able to set up Ubuntu (22.x) VM. Virtualbox has a beta release for silicon architecture compatibility but for some reason, it keeps failing on my machine.
While searching for a solution, I came across UTM. This article is about the UTM tool and how to set up Ubuntu on macOS silicon architecture, hassle-free! ❤️
What is a hypervisor?
A hypervisor, also known as a virtual machine monitor (VMM), is a software or hardware component that enables the creation and management of virtual machines (VMs).
A hypervisor is a layer of software or firmware that abstracts physical hardware resources and divides them into multiple virtual environments, known as virtual machines. Each virtual machine operates as an independent computer system with its own operating system (OS) and applications.
Types of Hypervisors
There are two main types of hypervisors:
Type 1 Hypervisor (Bare-Metal Hypervisor): This hypervisor runs directly on the underlying hardware without the need for an additional operating system. It provides direct access to hardware resources and is typically used in enterprise data centres. Examples include VMware ESXi, Microsoft Hyper-V, and Xen.
Type 2 Hypervisor (Hosted Hypervisor): This hypervisor runs on top of an existing operating system and allows virtualization within that OS. It is commonly used on personal computers or workstations. Examples include Oracle VirtualBox, VMware Workstation, and Microsoft Virtual PC.
Installing UTM on macOS
Install using
homebrewpackage manager:brew install --cask utmInstall using the
dmginstallable:Install the application from here, and proceed to install it through the installer.
Download the Ubuntu ISO image
One way to set up our Ubuntu virtual machine is to use an ISO image.
Operating System Installation: ISO images are commonly used to install operating systems on virtual machines. By mounting the ISO image within the virtual machine, you can boot from it and initiate the installation process just as you would with a physical disc.
ISO images provide a convenient way to provide installation media or additional software to virtual machines without the need for physical discs. They simplify the process of deploying and configuring virtual machines, as well as allow for easy replication and sharing of virtual machine environments.
We will need to install an arm64 compatible ISO image for Ubuntu, you can get it from here. This is the server image for Ubuntu.
Configure the VM in the UTM application
Add a new Virtual machine by clicking the
+option in the UTM application.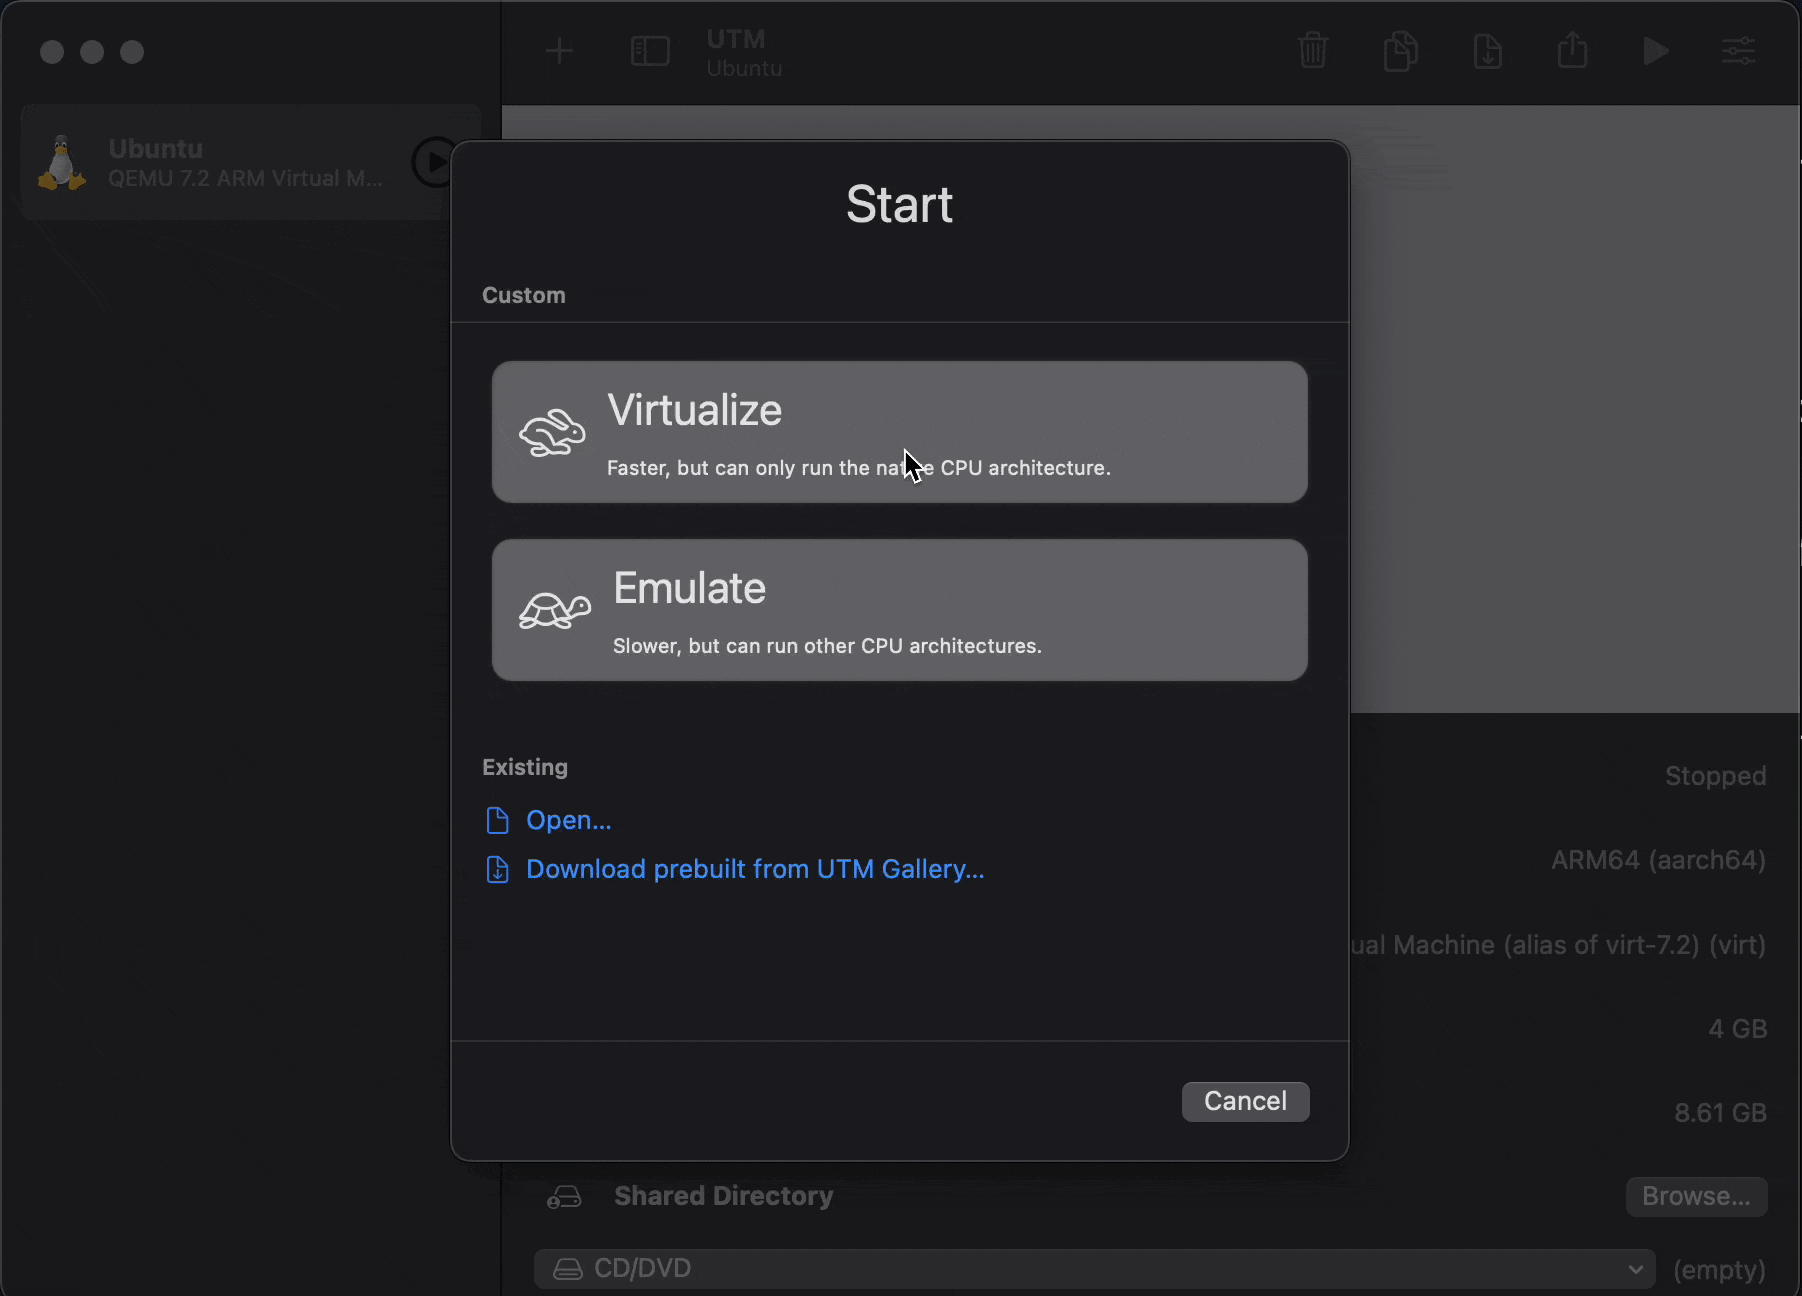
Select
browseoption in the Boost ISO Image, and configure the hardware options we want our host OS to share with the virtual machine.
See the documentation to see the use and minimum requirements for all these options which we are configuring for this virtual machine.
Finally, we can launch the virtual machine. Click the
▶️icon next to the newly configured vm to launch it.VM will start the os installation process, just tab and continue through the options. At one point, we will see select network settings. Here just stick with the default
ethoption. And next, we will see thestorage/diskoptions here also just leave defaults and continue.Once complete, we will be logged into our Ubuntu virtual machine. If you are stuck on a black screen after all installation of the os is complete. Simply stop the virtual machine instance. Go back to the UTM app, open the settings for the virtual machine and remove the ISO image we used to boot the system. Not required anymore. Then run the virtual machine again.
We will be logged into our system. Enter the username and password set up by you at the initial stage of running the vm the first time. Then you will be logged into your user profile.
 // this should out put /home/<username>
 pwd
(OPTIONAL) Install
graphical user interfacefor our server edition of Ubuntu which doesn't come pre-installed with it.// update the os sudo apt update // install the gui sudo apt install ubuntu-desktop // reboot the system sudo rebootWe will be logged back into the system with a graphical user interface.
Conclusion
Don't know how long this UTM application will be free-to-use but it works great. It's a great hypervisor and works out of the box on macOS silicon architecture as well as intel Macs. Might move away from Virtualbox permanently.